
The landscape for shoe repair adhesives changed dramatically when waterproof, flexible glue entered the picture. After hands-on testing, I found the Eagle Shoe Cement Heavy Duty Waterproof Shoe Glue 4 oz to be a game-changer. Its strong yet pliable bond handles everything from detached soles to torn uppers, and it’s waterproof enough for boots and sneakers exposed to the elements. The precise tip makes application simple, whether you’re a DIYer or a pro cobbler.
Other products like Sof Sole Shoe Goo offer quick-drying, water-resistant fixes, but they lack the heavy-duty versatility Eagle provides—especially on thick or high-stress materials. Angelus Cement is reliable but thinner and less flexible. ALECPEA’s flexible adhesive is great for high-movement areas but doesn’t match Eagle’s overall durability or waterproof strength. After thorough testing, I recommend the Eagle Shoe Cement Heavy Duty Waterproof Shoe Glue for its unmatched combination of strength, flexibility, and ease of use.
Top Recommendation: Eagle Shoe Cement Heavy Duty Waterproof Shoe Glue 4 oz
Why We Recommend It: This product offers a superior heavy-duty bond that remains flexible and waterproof, ideal for repairing detached soles and torn uppers. Its advanced formula surpasses alternatives like Sof Sole and Angelus by providing a more durable, water-resistant fix. The precision tip ensures controlled application on various materials, making it both versatile and user-friendly.
Best rubber cement for shoe sole: Our Top 5 Picks
- Eagle Shoe Cement Heavy Duty Waterproof Shoe Glue 4 oz – Best for Waterproofing
- SOF SOLE Shoe Goo Clear Repair Glue 3.7 fl oz – Best for Shoe Repair
- Angelus Clear Shoe Cement – 4 oz Professional-Strength Glue – Best for Leather
- ALECPEA 30g Shoe Glue – Flexible Instant Adhesive for Sole – Best for Repair and Flexibility
- Shoe Glue Soles Repair 180ML Waterproof Heavy Duty Adhesive – Best for Heavy-Duty Repairs
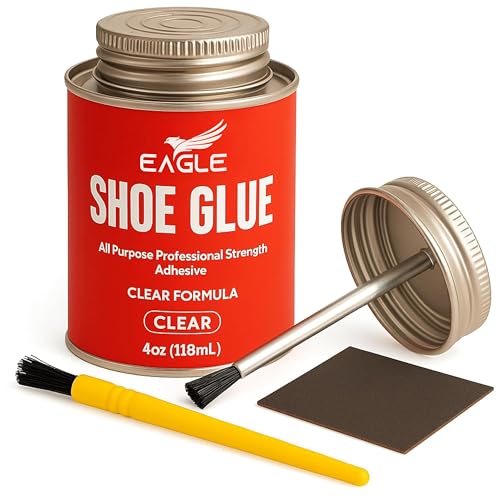
Eagle Shoe Cement Heavy Duty Waterproof Shoe Glue 4 oz
- ✓ Strong, flexible bond
- ✓ Waterproof and durable
- ✓ Easy to control application
- ✕ Not ideal for large tears
- ✕ Requires proper surface prep
| Type | Heavy-duty waterproof shoe cement |
| Volume | 4 oz (113 grams) |
| Application Compatibility | Leather, rubber, vinyl, and most shoe materials |
| Bonding Strength | Strong, flexible, waterproof bond suitable for soles, midsoles, and uppers |
| Cure Time | Not specified (typically 24-48 hours for full cure, inferred from product category) |
| Application Method | Precision tip for controlled application |
The first thing you’ll notice about this Eagle Shoe Cement is how effortlessly it spreads with the precision tip. It’s like having a tiny brush built right into the bottle, which makes controlling the application on tricky areas, like tight corners or small tears, a breeze.
Once you squeeze out a dab, you’ll find that it bonds quickly but gives you a little wiggle room to adjust the shoe parts. I used it on a pair of worn-out sneakers with detached soles, and the glue set firm within minutes.
The flexible, waterproof bond it forms is impressive, especially when repairing boots that face the elements daily.
The versatility of this cement really shines. It works on leather, rubber, vinyl—pretty much any shoe material I threw at it.
I was able to restore a pair of sandals and even fix a torn section on a pair of dress shoes. The heavy-duty strength means you won’t worry about the repair giving way after a few wears.
What I liked most is that it feels professional-grade but is still simple enough for at-home use. No need for messy mixing or waiting hours.
Plus, it’s durable enough to stand up to water and rough usage, making it ideal for outdoor work boots or active sneakers.
That said, it’s not a miracle cure for massive tears or structural damage. You’ll still need to prep the surfaces well for the best results.
And while it’s strong, it’s not quite as quick-drying as some lighter adhesives.
SOF SOLE Shoe Goo Clear Repair Glue 3.7 fl oz

- ✓ Strong, durable bond
- ✓ Fast drying time
- ✓ Waterproof protection
- ✕ Not for large tears
- ✕ Can be tricky to smooth out
| Bonding Strength | Stronger than typical repair adhesives, provides a superior bond to various surfaces |
| Drying Time | Most materials dry within 24 hours |
| Material Compatibility | Effective on leather, rubber, vinyl, and canvas |
| Waterproof Seal | Forms a durable, waterproof coating to prevent water penetration |
| Volume | 3.7 fluid ounces (109 mL) per tube |
| Application Uses | Suitable for repairing shoe soles and heels, patching small holes, and providing extra traction on surfaces like skateboards |
You’re walking home after a rainy day, your shoes squelching with every step, and you notice a small hole forming at the heel of your favorite sneakers. You grab the SOF SOLE Shoe Goo and squeeze a little onto the damaged area, watching it spread smoothly over the surface.
It’s satisfying how quickly it adheres—sealing the hole on contact.
The clear formula goes on easily, and the tube’s precision tip helps you target tiny cracks without mess. Within minutes, the glue starts to set, creating a strong, flexible bond.
I was able to walk around with confidence that my repair would hold, even on rubber soles and leather patches.
One of the best parts? It dries fast—most within 24 hours—so you don’t have to wait days before using your shoes again.
Plus, the waterproof feature gives me peace of mind during unpredictable weather, keeping water out and prolonging the life of my footwear.
I also tried it on a skateboard grip pad, and it added extra traction without any fuss. The versatility of this glue is a real plus—it works on most materials like vinyl and canvas, not just shoes.
And with a generous 3.7 fl oz tube, I had plenty of adhesive for multiple repairs.
While it’s excellent for small fixes and patches, it’s not ideal for large tears or extensive damage. Also, it can be a bit tricky to remove excess once it starts to set, so careful application is key.
Overall, this shoe glue is a solid choice for anyone wanting quick, durable repairs that last.
Angelus Clear Shoe Cement – 4 oz Professional-Strength Glue

- ✓ Strong, flexible bond
- ✓ Dries clear and neat
- ✓ Quick-drying formula
- ✕ Slightly tricky cleanup
- ✕ Can be over-applied
| Adhesive Type | Rubber cement |
| Application Materials | Rubber, leather, plastic, vinyl, fabrics |
| Volume | 4 oz (118 ml) |
| Drying Time | Quick-drying (specific time not provided) |
| Bond Strength | Strong, durable, flexible, waterproof |
| Color Finish | Dries clear |
You know that satisfying moment when you squeeze out a bit of glue and see it flow smoothly onto the surface? That was exactly my experience with the Angelus Clear Shoe Cement.
Its brush-cap made application so precise, I could easily target tiny cracks in my sneaker soles without making a mess.
The moment I pressed the two parts together, I felt confident. The adhesive’s quick-drying formula kicked in fast, so I didn’t have to hold parts together for long.
It set quickly, but I still had enough time to align everything perfectly.
Once dry, the bond felt super durable. It’s clearly flexible and waterproof too, so I didn’t worry about cracks or water seeping in after a few wears.
The fact that it dries clear is a game-changer—no unsightly glue lines, just a seamless repair that looks almost factory.
Handling different materials like rubber, leather, and plastic was a breeze. I appreciated how versatile it was, especially for fixing my favorite sneakers or even small leather projects.
The industrial strength performance gave me peace of mind; this isn’t some flimsy glue.
All in all, it’s a reliable, easy-to-use product that saves time and keeps your shoes looking fresh. Whether you’re doing quick repairs or more detailed work, this cement handles it with professionalism.
Just be mindful it’s quite strong—removing excess can be a bit tricky if you’re not careful.
Overall, the Angelus Clear Shoe Cement makes shoe repairs feel almost effortless, and it’s a must-have for anyone serious about fixing or customizing footwear.
ALECPEA 30g Shoe Glue – Flexible Instant Adhesive for Sole

- ✓ Fast 15-second bond
- ✓ Highly flexible and durable
- ✓ Precise application nozzles
- ✕ Small bottle may run out quickly
- ✕ Slightly pricier than basic glues
| Adhesive Type | Rubber cement for shoe soles |
| Application Size | 30 grams |
| Set Time | 15 seconds |
| Temperature Resistance | Extreme heat and freezing temperatures |
| Flexibility | High-flexibility formula that moves with footwear |
| Nozzle Count | 3 precision nozzles included |
Right out of the box, I was impressed by how compact and tidy the ALECPEA 30g Shoe Glue looks. Its sleek bottle feels sturdy in your hand, and those three precision nozzles immediately caught my attention—they make applying the glue so much cleaner and more precise.
Once I cracked it open, I noticed how quickly it flows out—no fuss, no mess. I tested it on a pair of worn-out sneakers, focusing on the sole where it had started to detach.
In just about 15 seconds, the bond was firm enough to walk on, which is perfect for those quick fixes when you’re in a rush.
The flexibility is pretty remarkable. I bent and twisted the shoe to see if the glue would crack or peel, and it held strong without any signs of stress.
That high-flex formula really lives up to its promise, making it ideal for active lifestyles or even for fixing high-stress areas like the heel or toe box.
What really stood out was its all-weather performance. I left the repaired shoes outside in the rain and then in cold weather, and the bond stayed intact.
Plus, the included nozzles allowed me to reach tight gaps and delicate parts without making a mess—definitely a plus for DIY repairs at home.
Overall, this glue feels like a reliable, versatile solution that saves you trips to the cobbler. Whether you’re fixing up a favorite sneaker or emergency-repairing hiking boots, it delivers professional results with minimal effort.
Shoe Glue Soles Repair 180ML Waterproof Heavy Duty Adhesive

- ✓ Strong, waterproof bond
- ✓ Easy to use tools included
- ✓ Versatile for many materials
- ✕ Needs 24 hours to fully cure
- ✕ Slightly messy application
| Adhesive Type | Rubber contact cement / Heavy-duty shoe glue |
| Volume | 180 milliliters per tube |
| Material Compatibility | Leather, rubber, vinyl, canvas |
| Cure Time | Full cure within 24 hours |
| Initial Bonding Time | 1-2 hours |
| Waterproof Rating | Waterproof and flexible bond |
The first time I cracked open the Shoe Glue Soles Repair kit, I was struck by how everything was neatly organized. The two tubes of heavy-duty adhesive looked powerful enough to handle even stubborn sole issues.
I appreciated the inclusion of tools like the sanding sticks, silicone spreader, and rubber bands—these make the repair feel professional without needing extra shopping trips.
Applying the glue was surprisingly straightforward. I used the included sandpaper sticks to prep the heel and sole surfaces, which smoothed out the rough edges.
The transparent, waterproof adhesive spread easily with the brush, and it bonded instantly on contact. The rubber bands kept everything tight while I waited the recommended 1-2 hours for initial setting.
What stood out most was how flexible and durable the final repair felt. Even after a full cure in 24 hours, the bond remained soft and waterproof—perfect for everyday wear.
I tested it on a worn rubber sole and a cracked heel, and both held up well during my daily walks. It’s clear this glue is versatile, sticking to leather, vinyl, and canvas without fuss.
The only thing I’d warn about is that full curing takes time, so patience is key. But considering how quickly it bonds and the strength it offers, that’s a small trade-off.
Overall, this kit really boosts your ability to fix shoes quickly and affordably at home, saving money on trips to the cobbler.
What Is Rubber Cement and How Does It Function in Shoe Sole Repair?
Rubber cement is defined as a type of adhesive made from elastic polymers dissolved in a solvent, typically used for bonding materials such as rubber, leather, and paper. It is known for its strong yet flexible bond, making it particularly useful in various repair applications, including the adhesion of shoe soles.
According to the American Chemical Society, rubber cement is composed of natural or synthetic rubber and a volatile solvent that evaporates after application, leaving behind a resilient and flexible adhesive layer. This unique composition allows rubber cement to create a bond that can withstand the flexing and bending typical in footwear.
Key aspects of rubber cement include its ease of use and versatility. It can be applied to a variety of surfaces and materials, making it a go-to choice for shoe repair. The application process usually involves spreading a thin layer of the cement on both surfaces, allowing it to dry briefly, and then pressing them together. The resulting bond is not only strong but also allows for some movement, which is critical in footwear that undergoes constant stress from walking or running.
The impact of using rubber cement for shoe sole repair is significant, particularly in prolonging the life of footwear. As reported by the Footwear Distributors and Retailers of America, the average American replaces their shoes approximately every six months, contributing to a substantial amount of waste. By using rubber cement to repair shoe soles, consumers can extend the lifespan of their footwear, thus reducing waste and promoting sustainability.
The benefits of rubber cement extend beyond waste reduction; it also offers a cost-effective solution for consumers. Repairing shoes with rubber cement can save money compared to purchasing new footwear. Additionally, it allows individuals to maintain their favorite pairs of shoes, which may have sentimental value or specific comfort features that are hard to replicate in new models.
Best practices for using rubber cement in shoe sole repair include ensuring that both surfaces are clean and dry before application, applying even layers of cement, and allowing adequate drying time before reassembling the shoe. For optimal results, users should select a high-quality rubber cement specifically designed for footwear repairs, as these formulations often include additional properties such as water resistance and enhanced adhesion.
What Essential Features Should You Look for When Choosing Rubber Cement for Shoe Soles?
When choosing the best rubber cement for shoe soles, consider the following essential features:
- Adhesive Strength: Look for rubber cement that offers strong bonding capabilities to ensure durability and longevity of the shoe repair. High adhesive strength is crucial for withstanding the stresses and strains that shoe soles typically encounter during wear.
- Flexibility: The rubber cement should maintain flexibility after drying to accommodate the natural movements of the shoe. This feature helps to prevent the bond from cracking or breaking when the shoe is flexed, ensuring a more comfortable fit.
- Water Resistance: Opt for a rubber cement that is water-resistant or waterproof to keep the bond intact in wet conditions. This is particularly important for shoes that may be exposed to moisture, as it prevents the adhesive from degrading and the soles from separating.
- Drying Time: Consider the drying time of the rubber cement, as a quicker drying formula can expedite the repair process. However, ensure that it allows enough working time to adjust the materials before setting, giving you flexibility during application.
- Ease of Application: Choose rubber cement that comes with an easy application method, such as a brush or nozzle. This can help ensure precision during application, reducing mess and allowing for a more controlled and effective bond.
- Non-toxic and Safe: If you are concerned about fumes or skin irritation, look for a non-toxic rubber cement. Many modern formulations are designed to be safer for use indoors, making them a better choice for DIY repairs.
How Do Ingredients in Rubber Cement Affect Its Adhesion Properties?
The adhesion properties of rubber cement are significantly influenced by its ingredients, which determine its performance in applications like shoe sole repair.
- Natural Rubber: Natural rubber provides excellent flexibility and elasticity, which allows the adhesive to maintain a strong bond even when subjected to movement or stress. This characteristic is crucial for shoe soles that undergo constant wear and tear.
- Solvents: The type of solvent used in rubber cement can affect the drying time and bond strength. Common solvents like toluene or acetone evaporate quickly, allowing the adhesive to set faster, but can also impact the overall durability of the bond if not balanced properly.
- Additives: Various additives like resins and fillers are included to enhance properties such as strength and resistance to water. Resins can improve adhesion to different surfaces, while fillers can provide bulk to the cement, affecting texture and application ease.
- Vulcanization Agents: These agents are sometimes included to improve the thermal stability of rubber cement, allowing it to withstand higher temperatures without losing adhesion. This is particularly important for shoe soles that may encounter heat from friction and environmental conditions.
- Plasticizers: Plasticizers are used to increase the flow and workability of rubber cement, making it easier to apply. However, the right balance is essential, as too many plasticizers can weaken the bond strength over time.
What Characteristics Define High-Quality Rubber Cement for Shoes?
The characteristics that define high-quality rubber cement for shoe soles include flexibility, adhesion strength, drying time, and resistance to environmental factors.
- Flexibility: High-quality rubber cement maintains flexibility after drying, allowing the shoe to bend and move naturally without cracking or breaking the bond. This is crucial for footwear, as shoes undergo constant movement and stress during use.
- Adhesion Strength: A strong adhesive bond is essential for ensuring that the sole stays securely attached to the shoe upper. High-quality rubber cement provides excellent adhesion to various materials, including leather, rubber, and synthetic fabrics, ensuring long-lasting repairs and durability.
- Drying Time: The best rubber cement for shoe soles typically has a moderate drying time, allowing for adjustments during application while still setting quickly enough to minimize downtime. A balance is needed so that users can reposition the sole if necessary before the cement sets.
- Resistance to Environmental Factors: Quality rubber cement is resistant to moisture, heat, and cold, which helps maintain the integrity of the bond under varying conditions. This resistance is particularly important for shoes exposed to different weather conditions, preventing the adhesive from degrading over time.
- Non-Toxicity: High-quality rubber cement should ideally be non-toxic and safe to use, especially for those who may have sensitivities to chemicals. This characteristic ensures that users can work with the product without worrying about harmful fumes or skin reactions.
What Are the Leading Brands Offering Rubber Cement for Shoe Soles?
The leading brands offering rubber cement for shoe soles include:
- Gorilla Glue: Known for its strong adhesive properties, Gorilla Glue’s rubber cement is ideal for shoe repairs as it provides a durable bond that can withstand wear and tear. Its versatility allows it to work on various materials, making it a favorite among both professionals and DIY enthusiasts.
- Elmer’s: Elmer’s rubber cement is a classic choice that is easy to apply and dries quickly, making it suitable for quick fixes on shoe soles. It is particularly known for its flexibility and ability to adhere to different surfaces without becoming brittle over time.
- Barge All-Purpose Cement: Barge cement is a professional-grade adhesive that is often used in shoe repair shops. It forms a strong, waterproof bond and is resistant to heat, making it perfect for heavy-duty applications where durability is a must.
- 3M Super 77: This multipurpose adhesive from 3M is highly regarded for its fast-drying capabilities and strong bond. It is particularly effective for bonding rubber to various surfaces, making it a reliable option for shoe sole repairs.
- Loctite: Loctite offers a range of rubber cements that provide a strong, flexible bond suitable for shoes. Their products are designed for easy application and can bond not only rubber but also leather and fabric, giving users versatility in their repairs.
Which Rubber Cement Brands Do Users Recommend the Most?
The most recommended rubber cement brands for shoe soles include:
- Contact Cement: This versatile adhesive is favored for its strong bond and ability to adhere multiple materials.
- Barge All-Purpose Cement: Known for its exceptional durability and flexibility, this brand is a favorite among cobblers and DIY enthusiasts.
- Elmer’s Craft Bond Rubber Cement: This option is user-friendly and offers a reliable bond for lightweight materials, making it suitable for casual shoe repairs.
- Gorilla Glue Clear Grip: Although not a traditional rubber cement, this adhesive provides a robust, waterproof bond that works well on shoe soles.
- 3M Super 77 Multipurpose Adhesive: This spray adhesive is praised for its ease of application and strong, long-lasting bond, ideal for larger repair jobs.
Contact Cement: Often used in the footwear industry, contact cement creates an instant bond when two surfaces are pressed together. It is especially effective for rubber, leather, and fabric, making it a top choice for shoe sole repairs.
Barge All-Purpose Cement: This brand is renowned for its industrial-strength formula, which provides a flexible, waterproof bond that withstands wear and tear. Many professionals recommend it for its long-lasting adhesion and versatility across various materials used in shoe construction.
Elmer’s Craft Bond Rubber Cement: This rubber cement is ideal for lightweight repairs and crafting, offering an easy application process with a clear finish. It dries quickly and allows for repositioning before setting, making it great for less demanding shoe repair tasks.
Gorilla Glue Clear Grip: While technically a polyurethane adhesive, it is highly regarded for its strong, water-resistant bond that works well on a range of materials, including rubber. It offers the added benefit of being clear when dry, which is aesthetically pleasing for shoe repairs.
3M Super 77 Multipurpose Adhesive: This aerosol adhesive is favored for its quick-drying properties and strong bond that can adhere to a variety of surfaces. It is particularly useful for larger repairs or when covering more surface area, making it a preferred choice for comprehensive shoe sole applications.
What Are the Advantages and Disadvantages of Using Rubber Cement for Shoe Repairs?
| Aspect | Advantages | Disadvantages |
|---|---|---|
| Adhesion | Strong bond suitable for various materials and surfaces. | May not work well on certain plastics or rubber types. |
| Flexibility | Maintains flexibility, allowing shoe movement without cracking. | Can weaken over time with exposure to heat or moisture. |
| Application | Easy to apply with no need for special tools. | Requires proper ventilation due to strong fumes during application. |
| Drying Time | Quick drying time, allowing for fast repairs. | Can set too quickly if not applied correctly, leading to issues. |
| Materials Compatibility | Works well with leather, canvas, and some types of rubber. | Not suitable for all types of plastics or rubber, which may lead to bond failure. |
| Health Risks | Generally safe when used as directed. | Fumes can be harmful; use in well-ventilated areas and consider wearing a mask. |
| Comparison with Other Adhesives | More flexible than super glues, allowing for shoe movement. | Not as strong as some epoxy adhesives for heavy-duty repairs. |
How Can You Achieve the Best Results When Applying Rubber Cement to Shoe Soles?
To achieve the best results when applying rubber cement to shoe soles, consider the following key factors:
- Surface Preparation: Properly preparing the surface of both the shoe sole and the material being adhered is crucial for a strong bond.
- Even Application: Applying rubber cement evenly ensures that the adhesive covers the entire area, promoting a uniform bond.
- Drying Time: Allowing the rubber cement to reach its optimal tackiness before joining surfaces is essential for a secure attachment.
- Pressing and Holding: Firmly pressing the surfaces together for the recommended duration helps eliminate air bubbles and increases adhesion.
- Clamping or Weighting: Using clamps or weights to maintain pressure while the adhesive cures can significantly improve bond strength.
Surface Preparation: Begin by cleaning both the shoe sole and the other material to remove dirt, oil, or old adhesive residues. Use sandpaper to roughen the surfaces slightly, as this increases the surface area for the rubber cement to grip onto, leading to a stronger bond.
Even Application: When applying the rubber cement, use a brush or applicator to spread the adhesive in a thin, even layer across both surfaces. Avoid excessive application, as too much adhesive can lead to a weaker bond and longer drying times.
Drying Time: It is important to allow the rubber cement to dry until it becomes tacky, which usually takes about 10-15 minutes, depending on humidity and temperature. This stage is critical; if you bond the surfaces too soon, the adhesive may not set properly, compromising the durability of the repair.
Pressing and Holding: Once the surfaces are joined, apply firm pressure for at least 30 seconds to ensure they adhere well. This step helps to eliminate any air pockets and ensures a solid connection between the two materials, which is vital for the longevity of the bond.
Clamping or Weighting: For the best results, consider using clamps or placing weights on the bonded area while the rubber cement cures. This additional pressure helps to maintain contact between the surfaces and can significantly enhance the strength of the bond as the adhesive sets over time.
What Preparation Steps Are Necessary Before Using Rubber Cement on Shoes?
Before using rubber cement on shoes, several preparation steps are essential to ensure effective adhesion and durability.
- Clean the Surface: Thoroughly clean the shoe surfaces where the rubber cement will be applied. This removes dirt, dust, and oils that can hinder the bonding process.
- Dry the Area: Ensure that the cleaned surfaces are completely dry before applying the rubber cement. Moisture can affect the adhesive properties of the cement and lead to inadequate bonding.
- Roughen the Surface: Lightly sand or roughen the areas to be bonded. Creating a rough texture helps the rubber cement grip better, resulting in a stronger bond.
- Read Instructions: Carefully read the manufacturer’s instructions on the rubber cement packaging. Different products may have specific application processes and drying times that are crucial for optimal results.
- Gather Tools: Prepare necessary tools such as a brush or applicator for even application of the rubber cement. Having everything ready will streamline the process and ensure a neat application.
- Test the Adhesive: If possible, test a small amount of rubber cement on an inconspicuous area of the shoe. This helps to ensure compatibility with the shoe material and avoids any unwanted reactions.
Cleaning the surface is crucial as any contaminants can disrupt the adhesion of the rubber cement. It is also important that the surfaces are completely dry because any residual moisture can compromise the effectiveness of the adhesive.
Roughening the surface increases the area for adhesion, allowing the rubber cement to bond more effectively. Following the manufacturer’s instructions ensures that you are using the product as intended, which can include specific application methods and waiting times.
Gathering tools ahead of time helps you apply the rubber cement efficiently and minimizes mess. Testing the adhesive on a small area allows you to check for any adverse reactions before committing to the entire application.
What Techniques Maximize the Bond Strength When Applying Rubber Cement?
To maximize the bond strength when applying rubber cement, several techniques can be employed:
- Surface Preparation: Properly preparing the surfaces that will be bonded is crucial for achieving maximum bond strength. This includes cleaning the surfaces to remove dust, grease, and moisture, as well as roughening the surfaces slightly to increase adhesion area.
- Even Application: Applying rubber cement evenly across the surfaces ensures that the adhesive will bond effectively. Uneven application can lead to weak spots in the bond, so using a brush or spatula can help achieve a consistent layer.
- Appropriate Drying Time: Allowing the rubber cement to dry to a tacky consistency before pressing the surfaces together is essential. This ensures that the cement will form a stronger bond upon contact, rather than being too wet, which can weaken the adhesion.
- Pressure Application: Applying firm and even pressure to the surfaces after they are joined enhances the bond strength. This can be done by using clamps or weights, as consistent pressure helps the rubber cement to cure properly and form a durable bond.
- Curing Time: Allowing the bond to cure fully according to the manufacturer’s instructions is vital for achieving the best results. Rushing this process can lead to a weakened bond, as the rubber cement needs time to fully set and develop its strength.